
Monitor the pH of your reef tank with Tasmota
Monitoring water values of your fish tank is essential. To keep your reef-ecosystem alive, several dozens of water values need to be measured. This can be quite annoying to do that manually all the time. So I just started automating the measurement of them via Tasmota. One of the leading indicators for a fish tank is the pH level of the water. Measuring the pH level gives you a good indication for several other water values as well.
Tasmota compatible hardware
There are not many options for measuring pH value in a DIY setup. To be precise, there are just two general options: Either you go for Atlas scientific’s EZO pH circuit, or for a cheap analog pH probe. The first option (including pH probe, the circuit, the additional carrier board) would have been roughly 100$ US + shipping. The analog probe option is about 20$ US only. You can purchase these probes basically everywhere.
These analog probe kits come with a probe and the circuit already included. They usually have a 3-pin header soldered to them: VCC, GND and Analog Out. Connecting them to an Wemos D1 Mini is a matter of seconds. Just make sure you use the 3.3V rail as VCC, so that the analog output cannot exceed the allowed maximum of 3.3V.
Extending tasmota to support analog pH probes
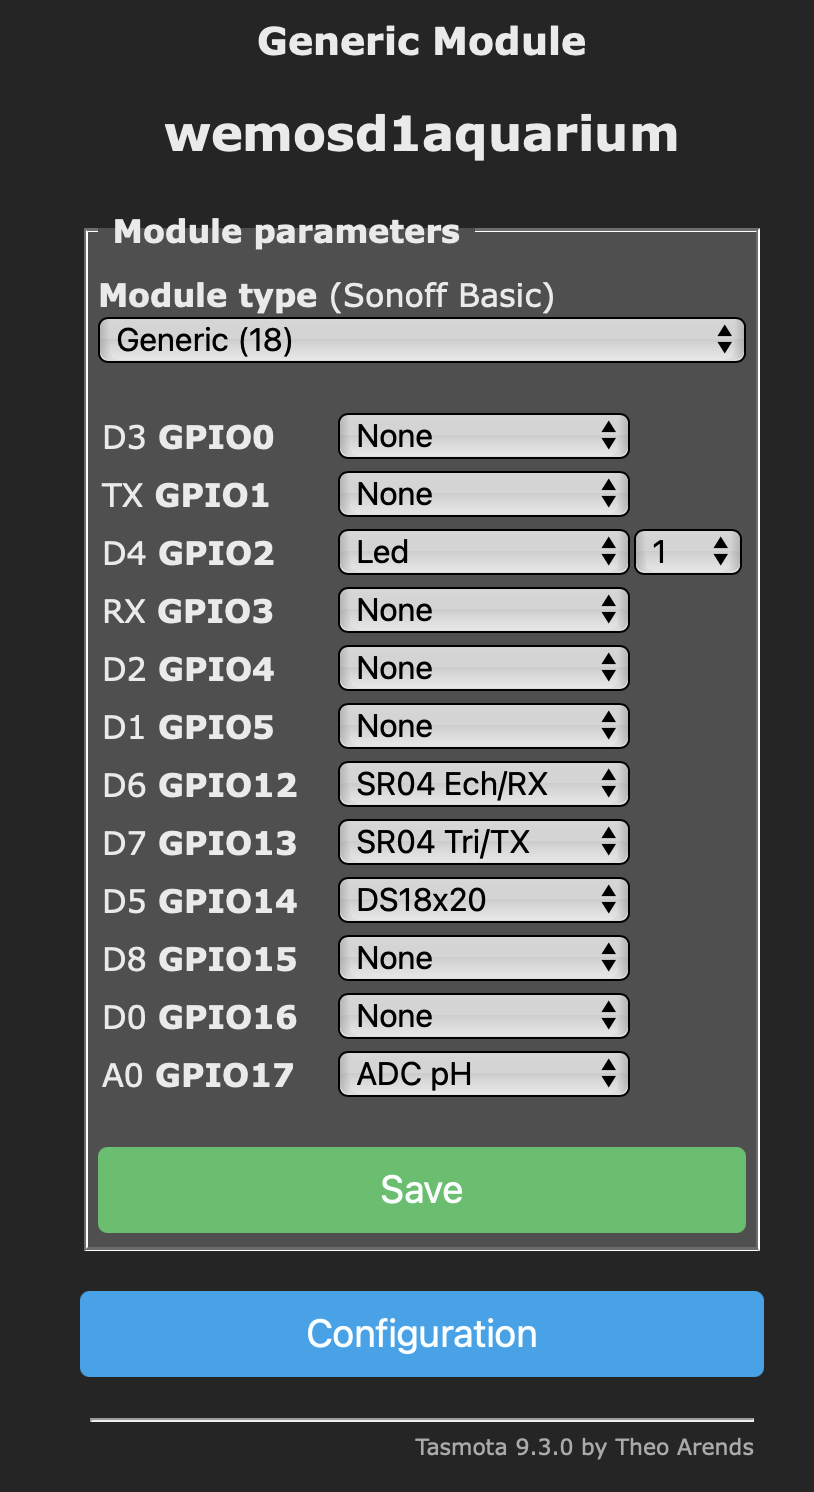
Since Tasmota didn’t support analog pH circuits, I just contributed the necessary changes to the Tasmota project. Starting with version 9.3.0 tasmota supports now a pH probe on analog inputs.
As you can see, you can configure “ADC pH” for your analog input:
Calibrating Tasmota pH readings
Since it is an analog probe, we need to calibrate it. To do that, at least two calibration solutions with different pH are needed. You can get them either as powder from the internet, or pre-mixed from your local aquarium dealer.
Calibration process:
- Put probe in solution with lower pH value. pH value of the solution is ANALOG_PH_CALSOLUTION_LOW_PH.
- Wait until analog value / RAW value stabilizes (~3 minutes)
- The analog reading is ANALOG_PH_CALSOLUTION_LOW_ANALOG_VALUE
- Clean probe and put in solution with higher pH value. pH value of the solution is ANALOG_PH_CALSOLUTION_HIGH_PH.
- Wait until analog value / RAW value stabilizes (~3 minutes)
- The analog reading is ANALOG_PH_CALSOLUTION_HIGH_ANALOG_VALUE
Analog readings can be read by either changing the analog port configuration to “Analog Input” while calibrating, or by enabling debug logs in the console and having a look at the RAW Value reading instead.
After noting down the values, you execute the following command in tasmota console:
AdcParam 9 <ANALOG_PH_CALSOLUTION_LOW_PH>, <ANALOG_PH_CALSOLUTION_LOW_ANALOG_VALUE>, <ANALOG_PH_CALSOLUTION_HIGH_PH>, <ANALOG_PH_CALSOLUTION_HIGH_ANALOG_VALUE>
Your probe is now calibrated and should give you the correct pH reading. I also contributed that documentation to the official Tasmota documentation
Connecting tasmota ph sensor to homeassistant
This step is pretty straight forward: Tasmota communicates to homeassistant via MQTT. You can just follow the standard tasmota docs and you are all set.
After running your sensor for a few hours, you should be a able to see your pH value:
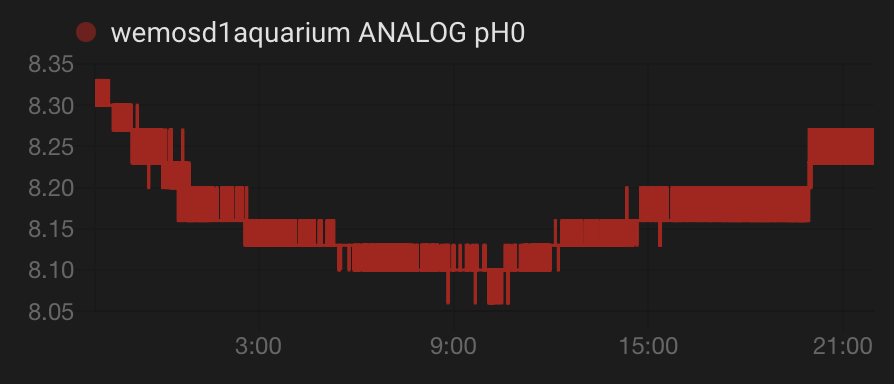
Works like a charm!