
ESP32 as BLE Gateway for Xiaomi Mijia BLE Temperature & Humidity Sensor
Problem statement
Too many unused BLE sensors, too much time during the COVID-19 lockdown - lets add more sensors! Just because we can…
No seriously. I struggled a lot with too much humidity in the air in several areas of my house. After having a hot shower in the bathroom, the humidity condensed at the window, increasing the risk for mold growth. In the basement where our food supplies are stored, we had issues with salt getting wet. And since I also own a reef-tank connected to my smart home system which cools the water using evaporation, the humidity in the living room is also a very interesting measurement. So wh
Connect BLE sensors to homeassistant
Homeassistant already provides its own integration for Xiaomi Mija sensors, so it would be quite obvious to just attach a BLE stick and get things started. For two reasons I didn’t choose this option:
- BLE is made for controlling devices in direct sight to the device controlling it (or at least the device sitting next to it somehow). Since my sensors will be spread across the house, a single BLE stick in my server rack might not be able to talk to all sensors.
- I try hard to segregate processing / presentation of my smart home data from the data acquisition / hardware interfacing. A few years back I started with OpenHAB running on a raspberry Pi which just connected to each and every hardware directly. This ended up in dozens of wires running through my flat just to be able to connect to an DS18S20 on the balcony. Don’t want to go back there!
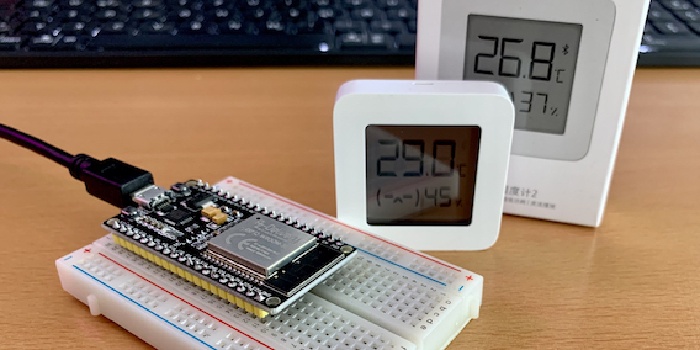
Transforming an ESP32 board into a BLE gateway
Once more, I relied on my favorite ESP firmware Tasmota to do the job. Luckily Tasmota introduced ESP32 support a few versions back. Even it is officially still in beta state, at least the BLE communication works rock solid.
- Follow the instructions here to flash your ESP with the required firmware. Make sure you use the ESP32 binary suffixed with
bluetoothto ensure you have all required drivers built in. - Login to the tasmota Web-UI and navigate to
Configuration->Configure BLEand turn onEnable Bluetooth. - As soon as you save the settings all kinds of BLE devices should be listed in the
Devices Seenlist below.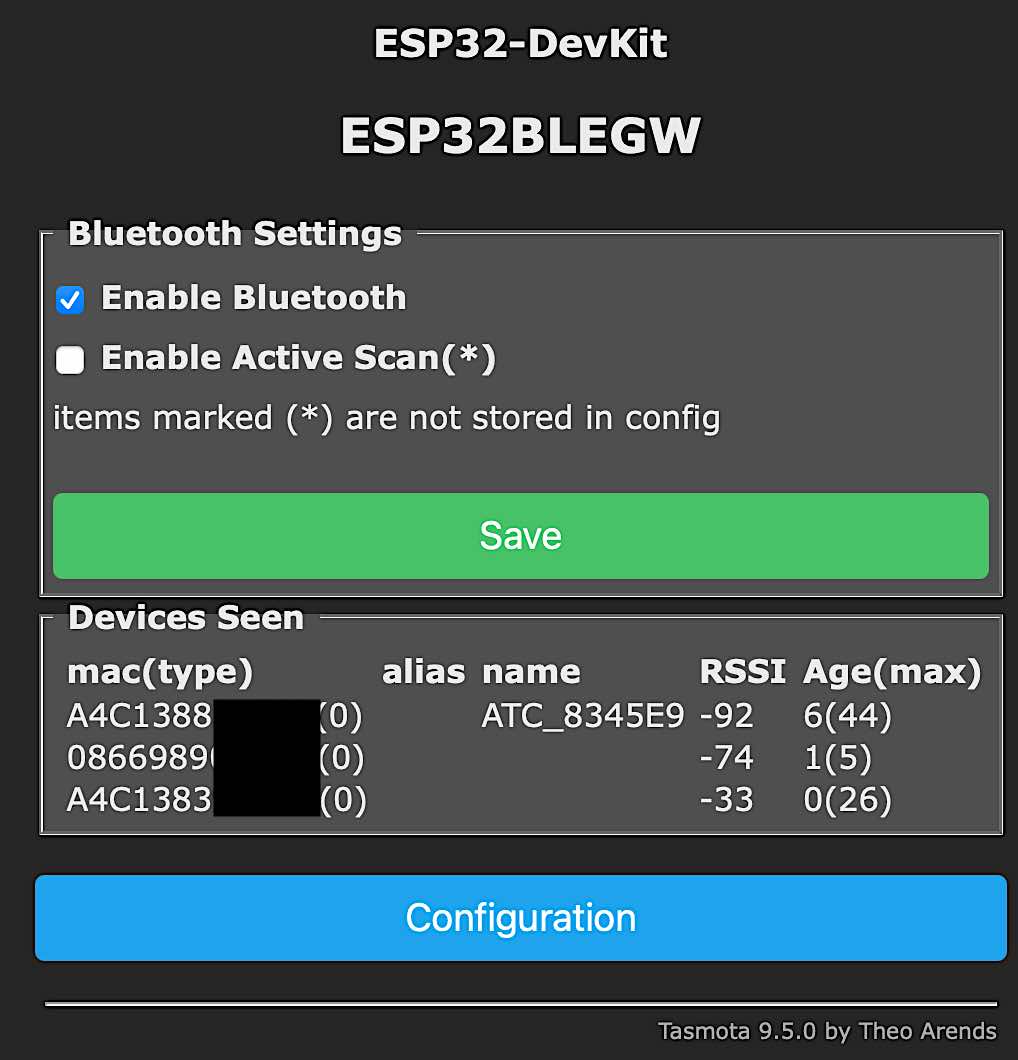
Your now all set already to use your ESP32 as BLE gateway. Just configure it to talk to your MQTT server as you would do with any other tasmota device as well.
Custom firmware for BLE sensors
The LYWSD03MMC sensors from Xiaomi come already with a stock firmware that can be used out of the box to connect to your gateway. However, there are a few disadvantages:
- Battery status is not reported correctly
- Active connection is required to poll data - this will drain your battery very fast
- Never trust a non-open-source firmware ;-)
Getting a custom firmware on the device is quite easy. Just follow the awesome instructions in atc1441’s repository on how to flash them. For the flash process itself you don’t need any additional tools. There is a browser-based tool available that works in all modern browsers.
Conclusion
I’ve got now three of these sensors connected to my homeassistant. More are already ordered. The connection is rock solid, and using the custom firmware I also get notified in case one of the devices will run out of battery soon. Using pre-manufactured devices instead of building my own circuitry saved me a lot of time. Definitely recommended!