Using an iPad as a replacement for a computer is easy for non-development tasks — but what about coding? Here's a fully portable VSCode setup that works even offline.
I recently came across the problem that when being on vacation I don’t have my main computer available. I usually only go on vacation with a light weight set of IT equipment, which is in this case my iPad Pro and a few cables and chargers. This is a conscious decision since I don’t want to invest too much - in the best case no time at all - into sitting in front of my computer. How ever, there are situations where you need to do a quick fix: for example one of my websites breaking or any other service not running anymore. Even if this would be theoretically possible it is hard to fix these things on a smart phone without having an IDE like VSCode[arch] in place.
Thus I needed to have a setup which allows me to fix at least urgent things while - at the same time - does not tempt me to do more than this.
Why iOS doesn’t support VSCode natively
Apple‘s iOS is a heavily regulated operating system. This brings many benefits, but also has disadvantages. One of them is that you cannot install apps that rely on an underlying operating system. VSCode makes heavy usage of the shell provided by the OS. As iOS doesn’t provide any shell it is hard to port these apps. The app would need to contain a whole Linux distribution in order to provide the same feature set.
This limitation leads to the need to run VSCode on a full featured OS instead of directly on the iPad. But don’t be afraid, it will nevertheless feel like it would be running directly on your iPad.
Hardware setup
Since we want to build up a portable and lightweight setup, we are going to use components that can run off the grid and have a small form factor.
USB C to USB C cable: Make sure it works for power delivery and data transfer.
Micro SD card 128GB or more. I personally use a SanDisk Ultra 400GB Class 10 card.
Case for the Raspberry Pi
iPad Pro with USB C port
(Bluetooth) Keyboard & Mouse for iPad
Setup RPi’s USB-C Port as network interface
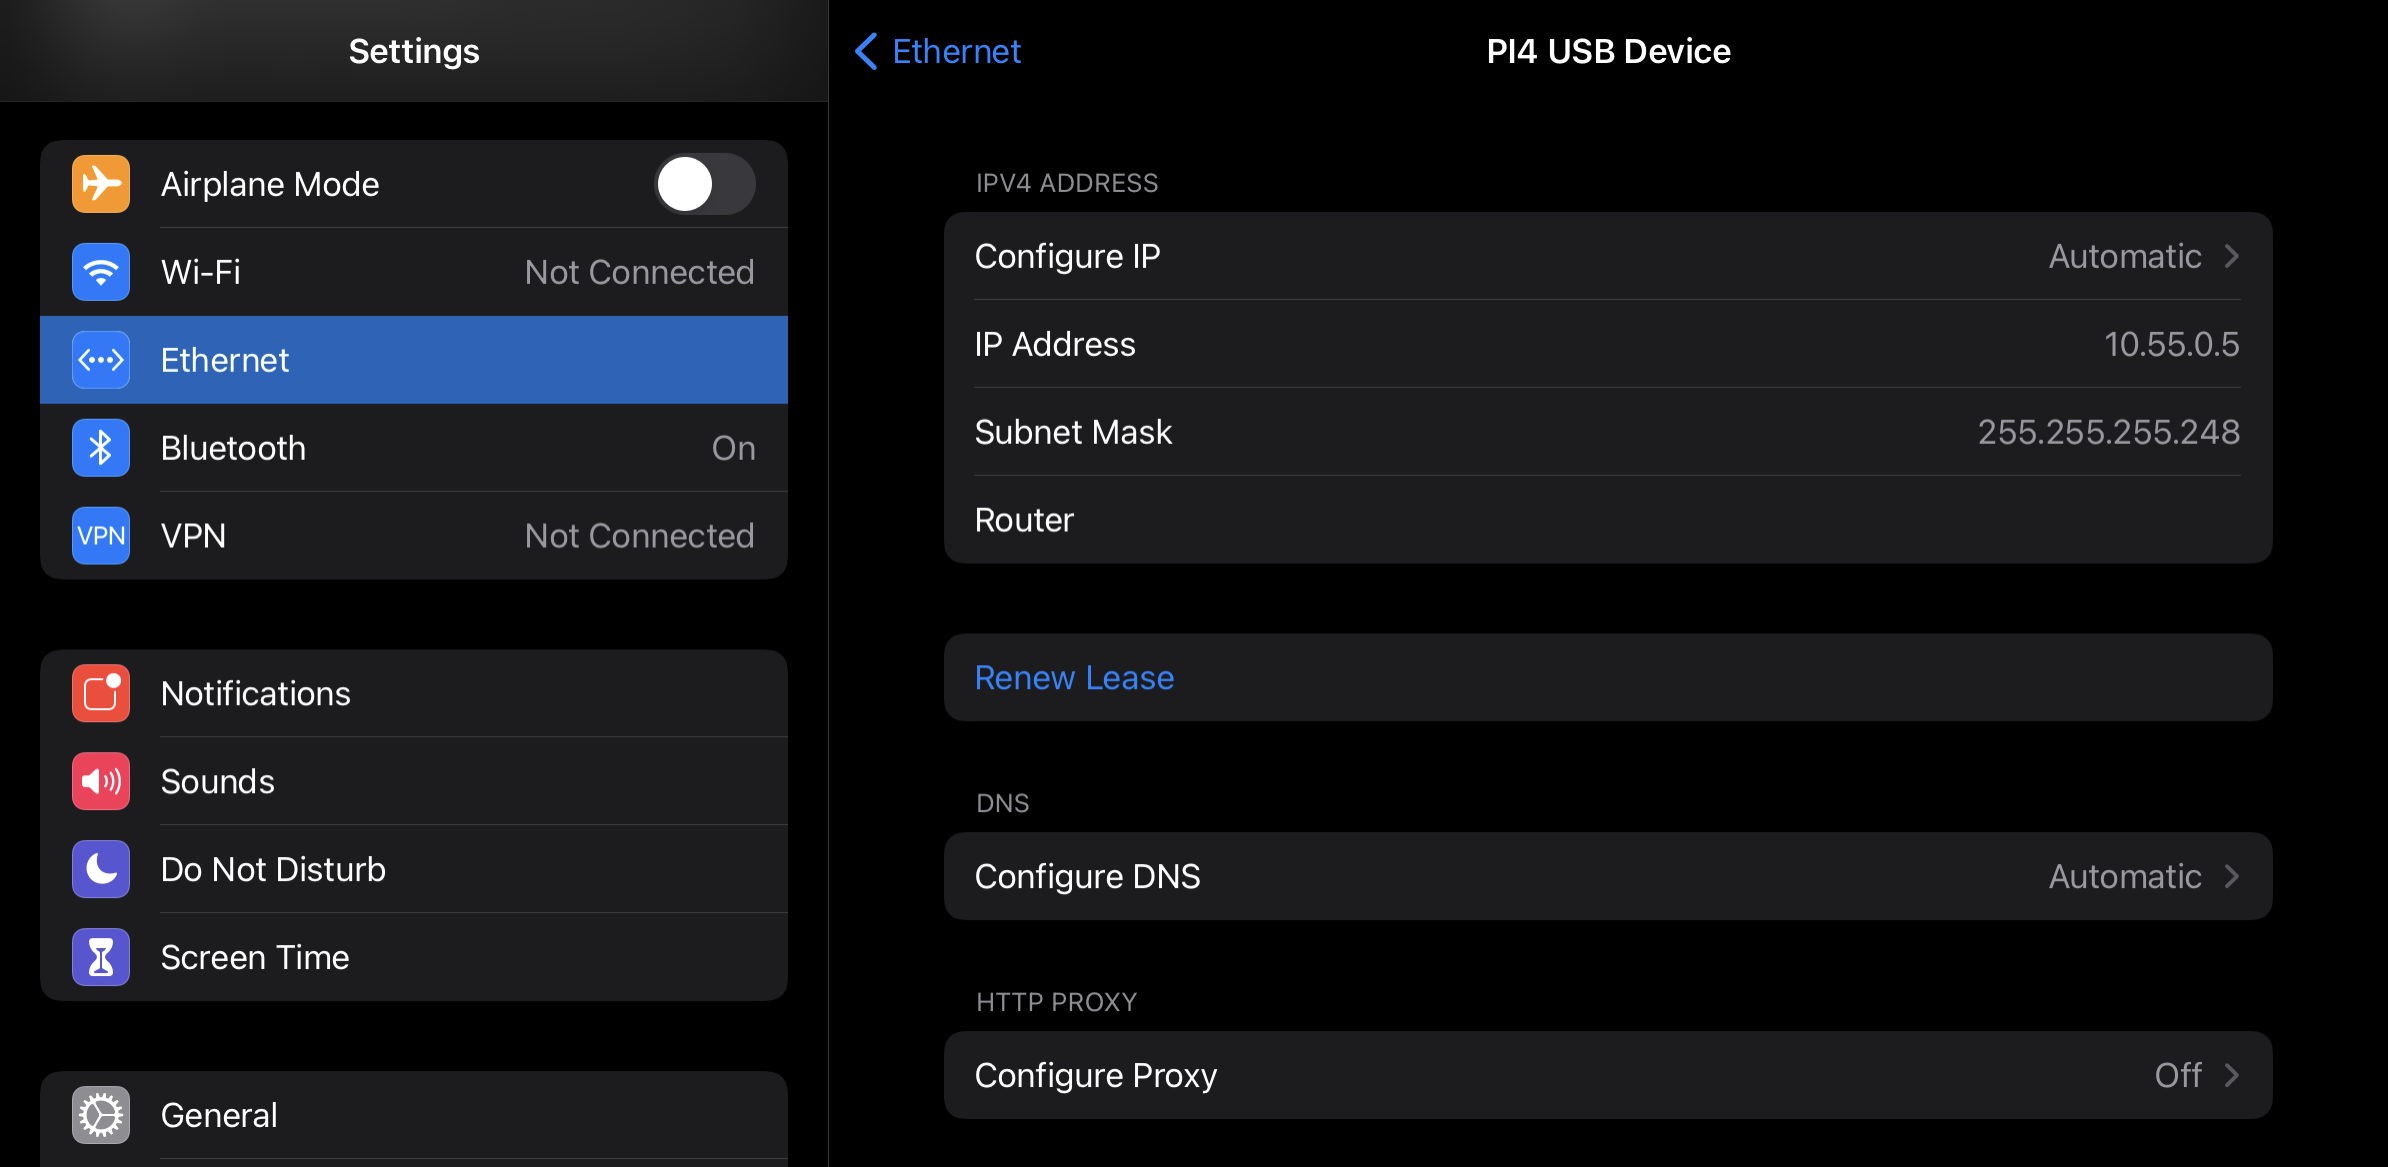
We‘ll configure the raspberry’s USB-C port to act as a network card of your iPad. This will enable the iPad to talk to your raspberry, while staying in its wifi network to be able to use internet based services.
SSH into your Pi and execute the following steps. Alternatively you can mount your SD card on a computer and do the steps 1-3 by editing the files there.
Edit /boot/config.txt and add dtoverlay=dwc2 to it. This will enable USB OTG mode on your raspberry.
Add modules-load=dwc2 to the end of /boot/cmdline.txt. It will make sure that the kernel receives the command to load this module as a parameter
In case SSH is not enabled yet, enable it by adding an empty file called ssh to /boot/. Creating it will enable the SSH server during the next boot
Edit /etc/modules and add libcomposite in a new line at the end of the file. It will make sure the USB gadget drivers are loaded
Edit /etc/dhcpd.conf and add denyinterfaces usb0 to it. Since we don’t want our USB network interface to be configured by DHCP, we explicitly deny this
Install dnsmasq using sudo apt-get install dnsmasq. dnsmasq will be acting as a DHCP server for the USB-based network interface. It will make sure that our iPad ethernet interface receives an IP address.
Create a new file /etc/dnsmasq.d/usbnetworkand add the following content:
For executing VSCode on the Pi and make it accessible from the iPad, we will use code-server[arch]. Code-server wraps VSCode and it’s dependencies into a service that can be accessed trough your browser.
Installing code-server on your raspberry Pi
Install yarn by executing sudo apt-get install yarn
Install code-server globally by executing yarn global add code-server
You should now be able to run code-server by executing yarn run code-server
Setup the code server configuration to match your network configuration. Edit ~/.config/code-server/config.yaml and paste the following config:
Your code-server instance should now be accessible from your iPad using Safari or any other browser via https://raspberrypi.local:8080. In case this doesn‘t work, try temporarily disabling the wifi on your iPad. You can enable it again after VSCode was loaded in Safari.
At this stage you should see the VSCode login prompt, asking for the password (changeme) which we configured in the yaml. To be able to use VSCode correctly, we need to do even more configuration on the iPad. Continue reading!
More detailed instructions on installing code-server are available here[arch].
Auto start code-server on system boot
To automatically launch code-server upon every system boot, we need to register it with systemd. Create a new file /lib/systemd/system/code-server.service and paste the following content:
Then execute systemctl daemon-reload to activate the new service.
You can check for the status of code-server now by running systemctl status code-server. It should tell you that it is active (running). In case it is not, you may try to restart it by executing systemctl restart code-server.
Add VSCode to your iPad home screen
Accessing VSCode via the iPad‘s Safari browser is not that easy, since VSCode uses Web-Sockets to communicate with the backend, running on your raspberry pi. To allow this communication, the connection needs to be encrypted (HTTPS or TLS). Fortunately code-server provisions a certificate for you. This certificate needs to be trusted on the iPad.
Import certificate on the iPad
On the raspberry, search for the file ~/.local/share/code-server/raspberrypi_local.crt and copy it to your iPad.
Open raspberrypi_local.crt in the Files App and follow the dialogues to trust the imported certificate.
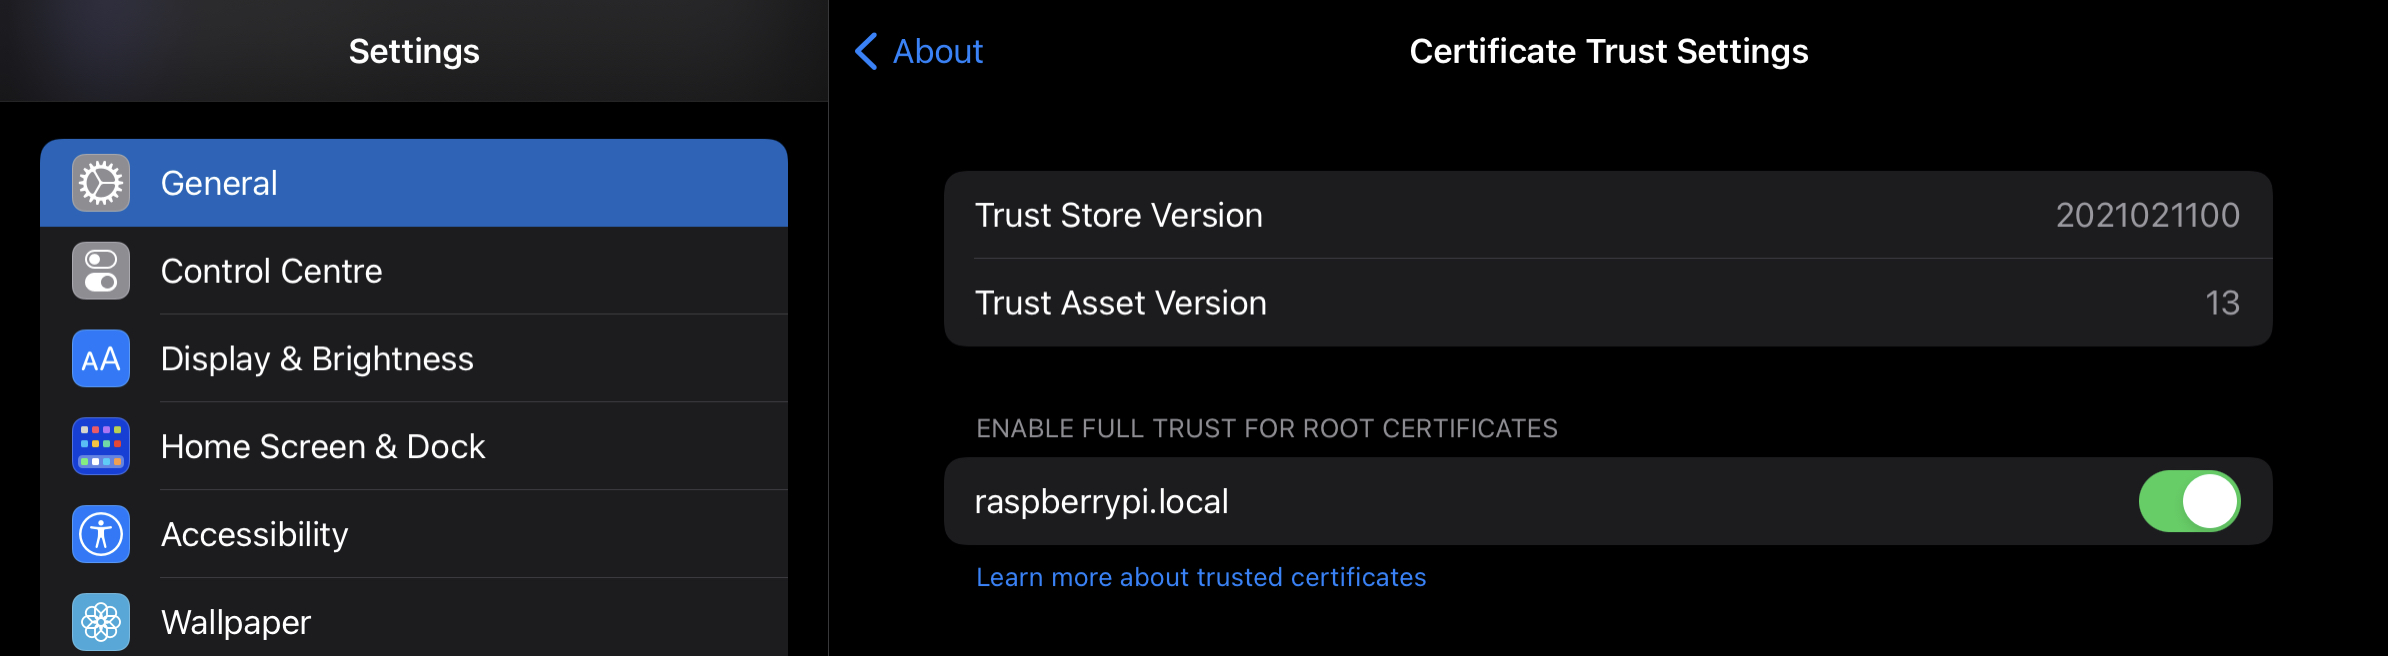
Open the Settings App and navigate to General -> About -> Certificate Trust Settings (on the bottom of the list) and turn on the switch Enable full trust for root certificates for the certificate called raspberrypi.local.
Add VSCode progressive web app as app icon to your homescreen
Open https://raspberrypi.local:8080 in Safari
Click on the share icon
Select Add to Home Screen and assign a name
You should now be able to open VSCode by clicking on the icon you just created.
Congratulations!
You’ve just created a fully portable software development setup, that can even be used when no internet connection is available. Let me know what you think in the comments!